WP-Rocket Set up

WP-Rocket is a WordPress plugin that is a powerful caching, used to improve your WordPress site’s loading speed, SEO rankings, and it requires no coding to be made. More information about this plugin can be found here. This Document will cover setting up the WP-Rocket plugin after installing it.

Before doing anything, the most obvious thing that you need is to install the WP-Rocket plugin itself. The plugin comes with a price, but it would be worth every buck that you used to make this plugin work. More information about installing the plugin and its prices can be found here.

After installing and activating the plugin, we can start going to the plugin’s dashboard, which is located on the WordPress site settings>WP-Rocket
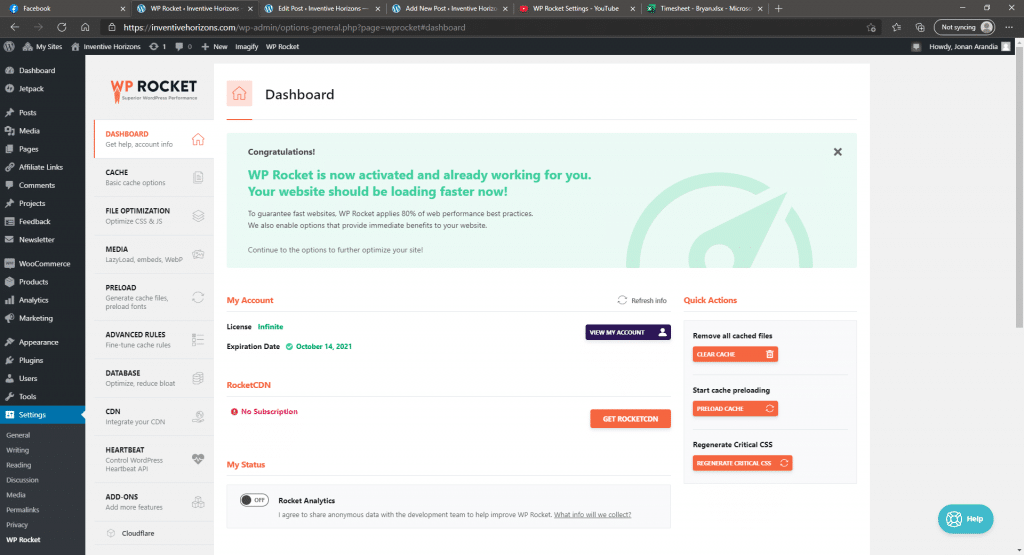
WP- Rocket Dashboard

Then follow to continue to copy the settings that you see on the pictures below. Be sure to save the changes before moving into the next section.

Cache
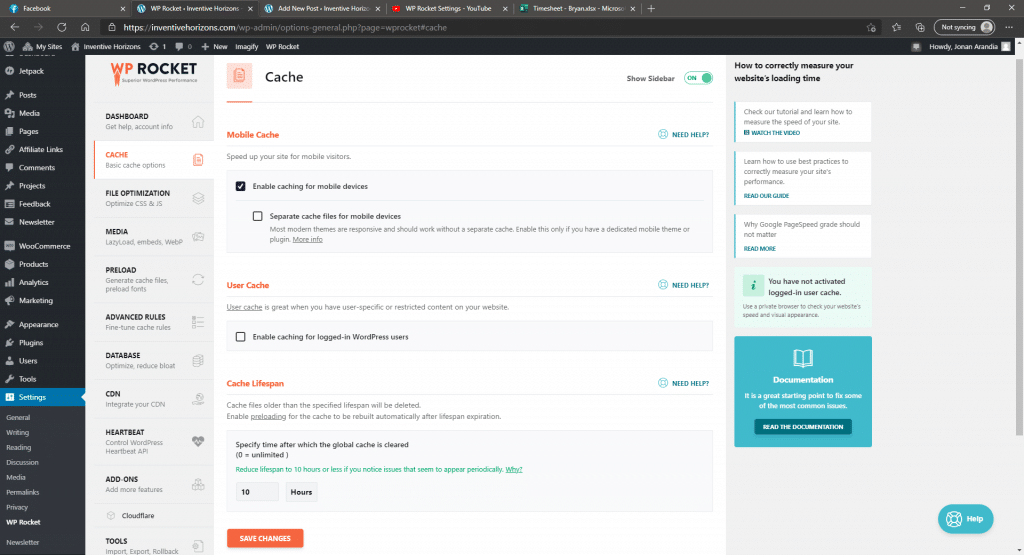
Cache

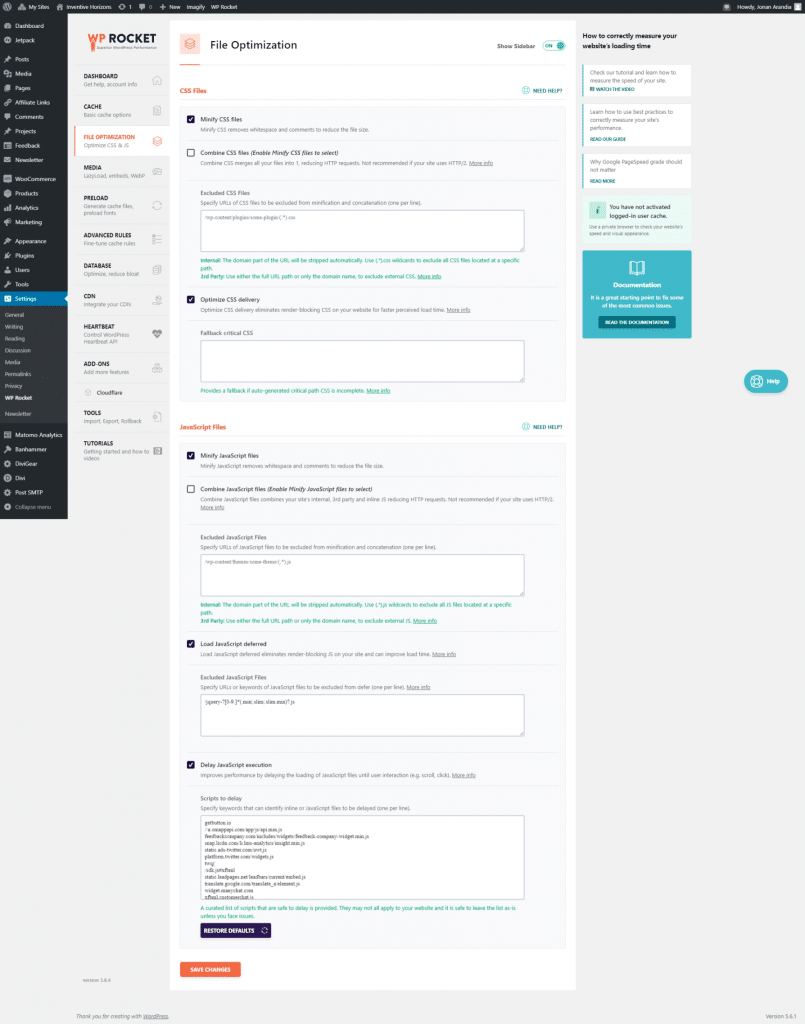
File Optimization

  • Activate Minify CSS files
  • Activate JavaScript files
  • Load JavaScript deferred
  • Delay JavaScript execution
Files Optimization

Media

  • Enable for Images
  • Enable for themes and videos
    This would be site-dependent (changes may occur)
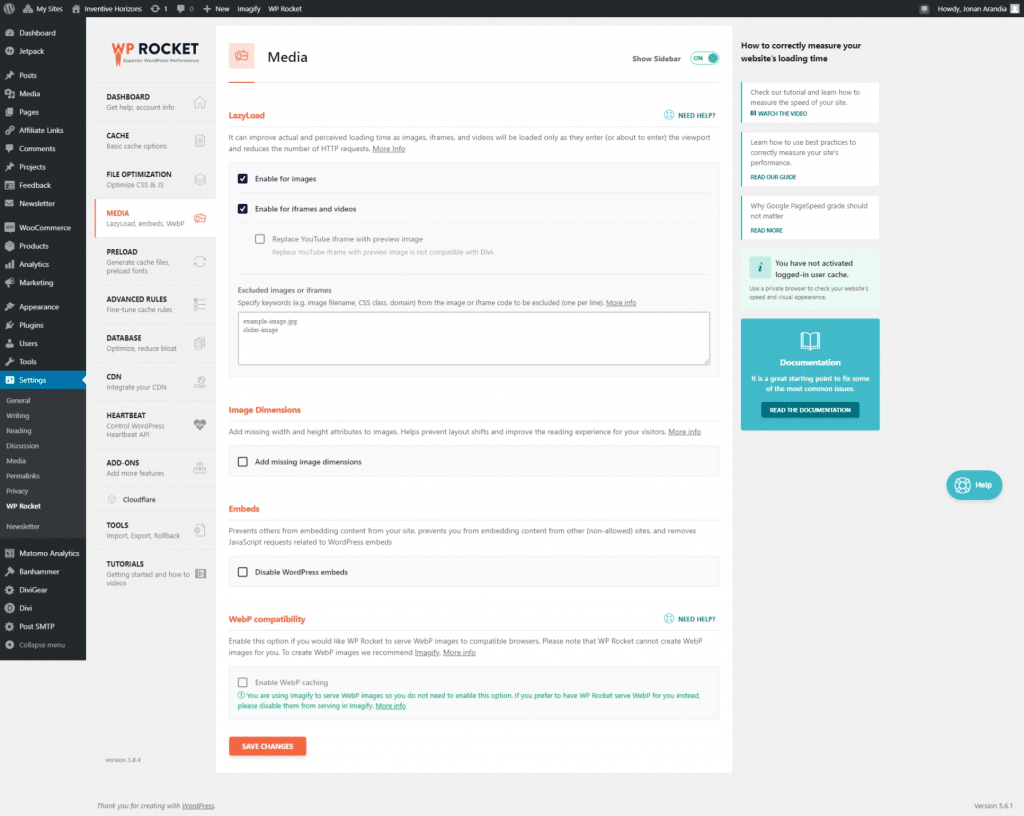
Media

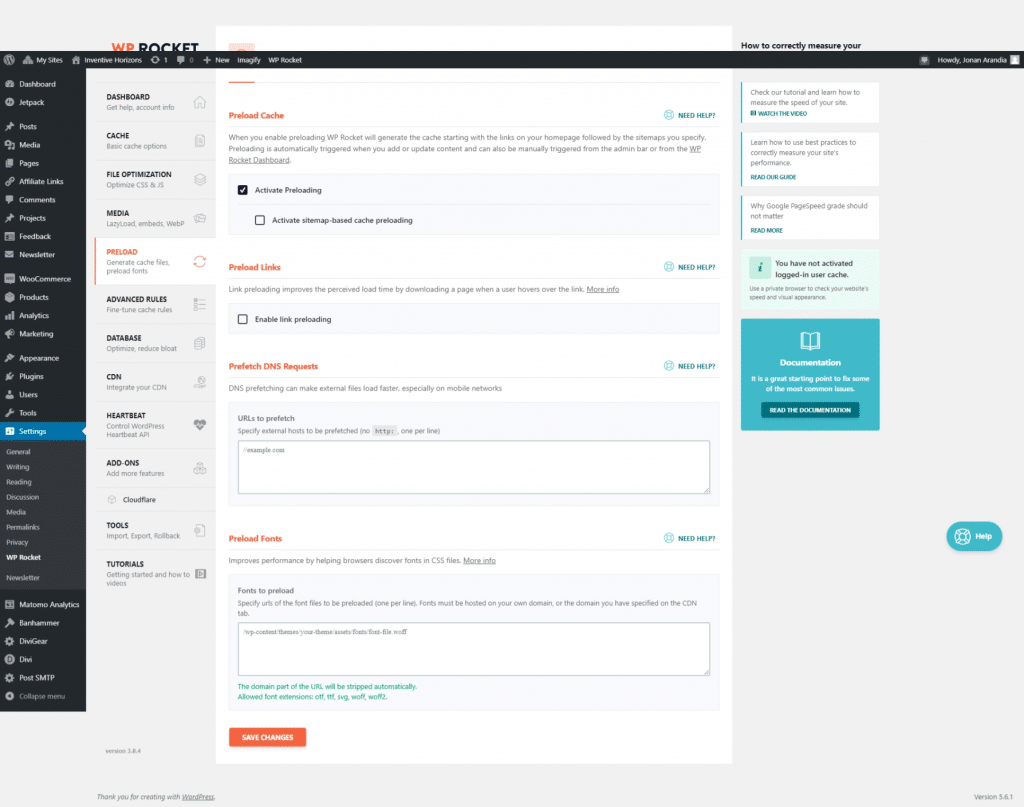
PreLoad

  • Activate Preloading
Preload

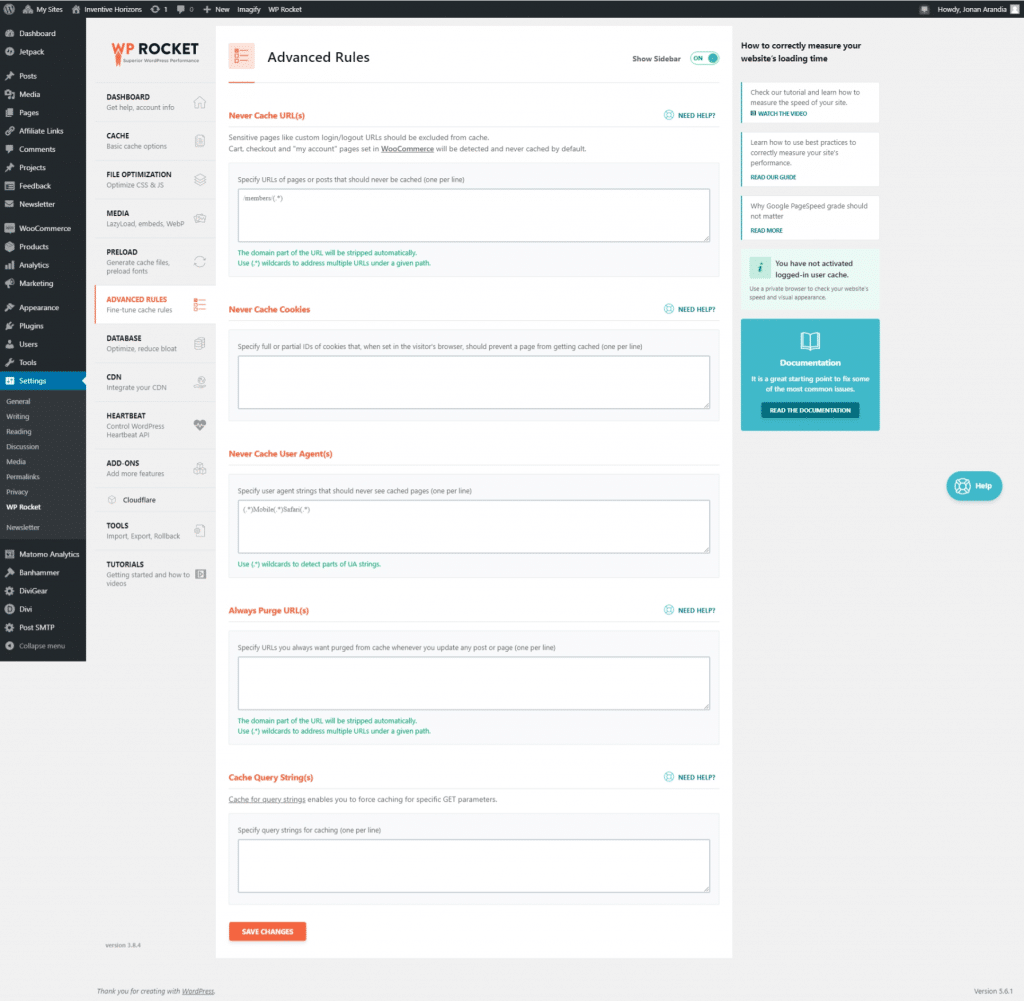
Advance Rules

Advance Rules

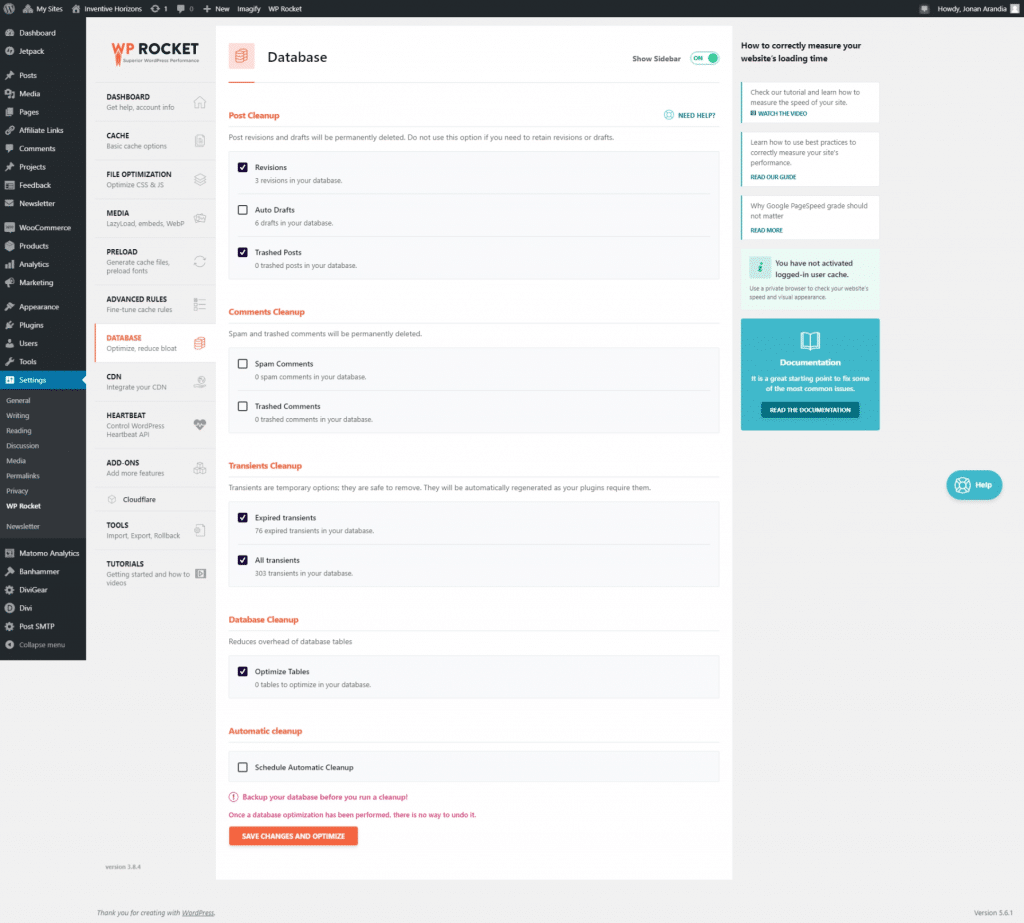
Database

  • Revision
  • Trashed Posts
  • Expired Transients
  • All transients
  • Optimize tables
Database

CDN

I didn’t get this

-Ok we can fix documentation later.

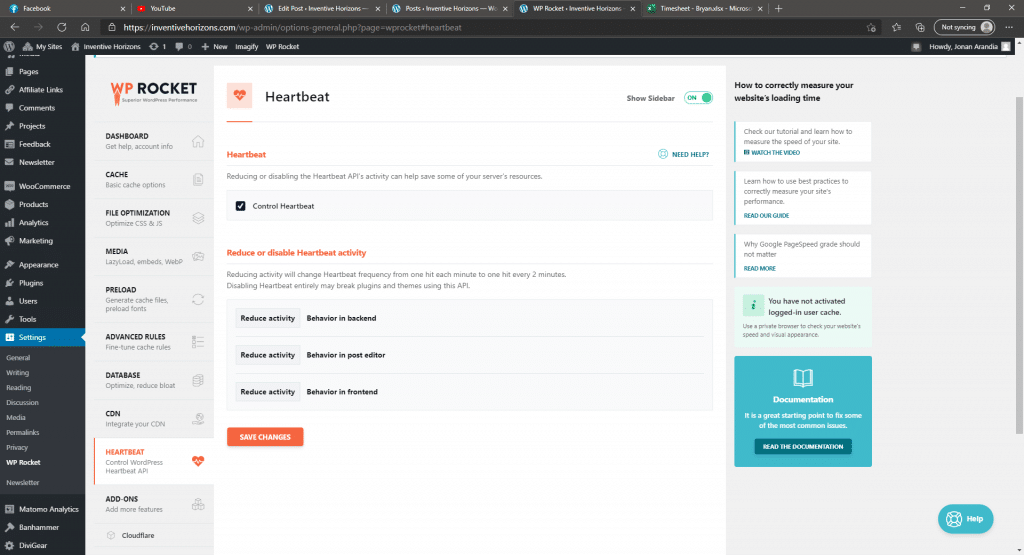
Heartbeat

  • Control Heartbeat
Heartbeat

Addons

  • Google Analytics
  • Facebook Pixel
  • Varnish
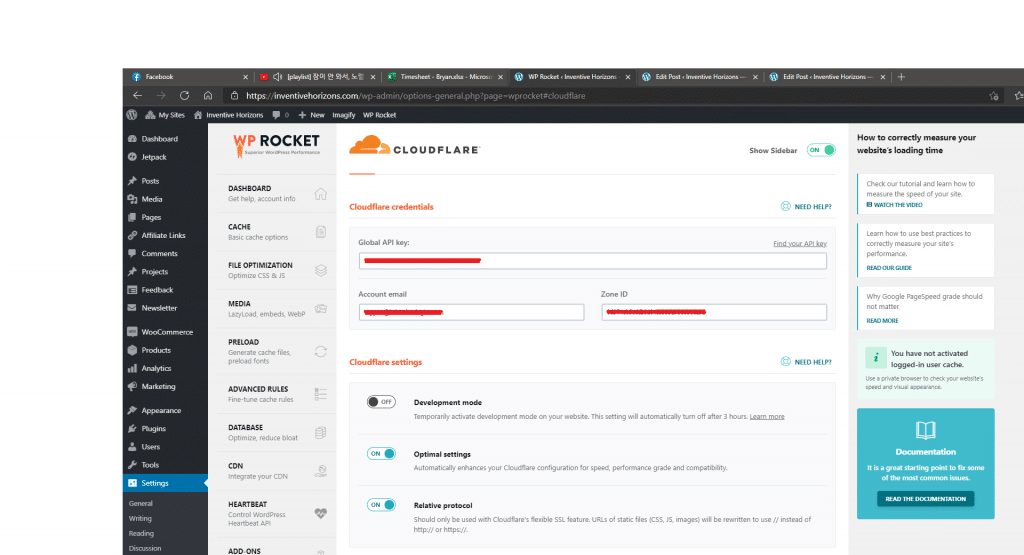
  • Cloudflare

Google analytics should mostly be open, and turning the Varnish on may depend.
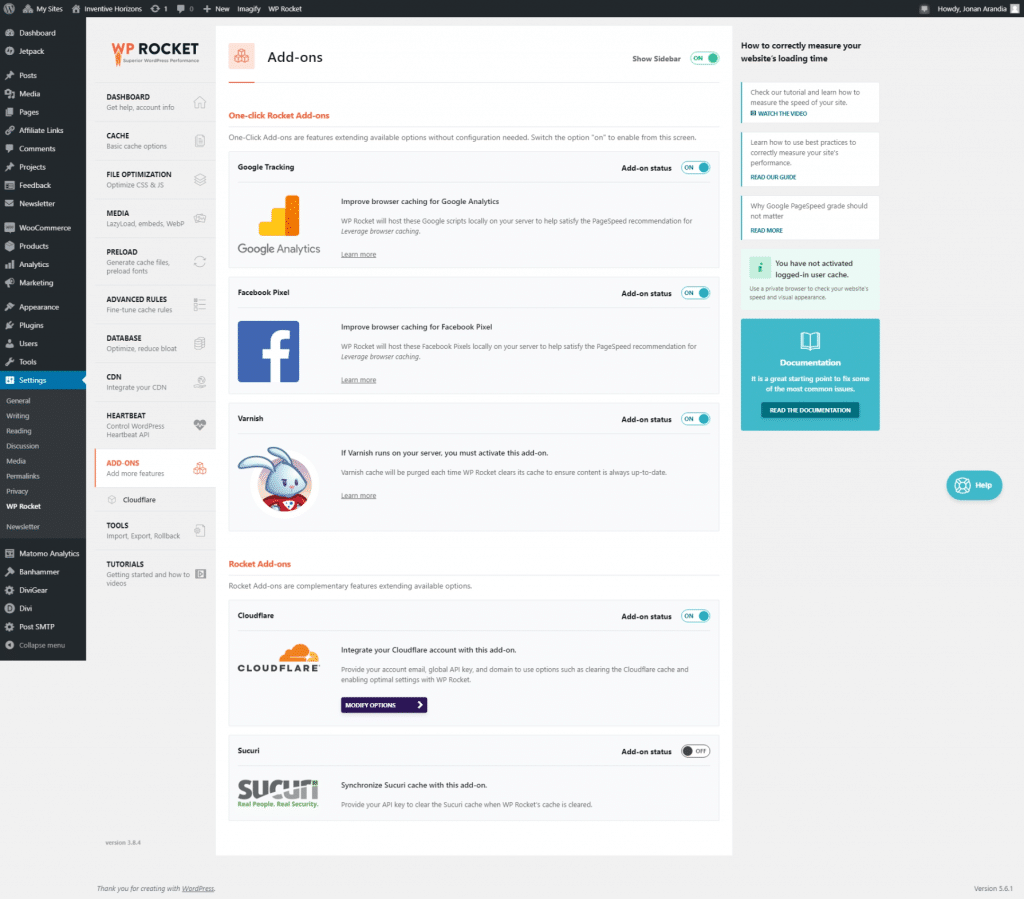
Addons

After turning on the Cloudfare remember to modify the options.

  • Optimal Settings
  • Relative Protocol

The keys, emails, and IDs would be provided by the admin.

This would indicate that the settings were completed.
A check this WP Rocket Settings – YouTube for a video tutorial
Jira Software

What is Jira software?

Jira is software that was designed to manage the work of teams. It is a work management tool that can be used for any kinds of teams, like requirements and test cases, agile, project management, software development, product management, task management, bug trafficking features, etc. Jira Software is a work management tool for software teams that need to organize and track their work. Jira is incredibly flexible and can be customized to work with your team’s unique workflow, not against it, meaning teams of all kinds can enjoy increased productivity and visibility as they march toward releasing amazing software and products.
Additional Information can be found at this link.

Managing all projects

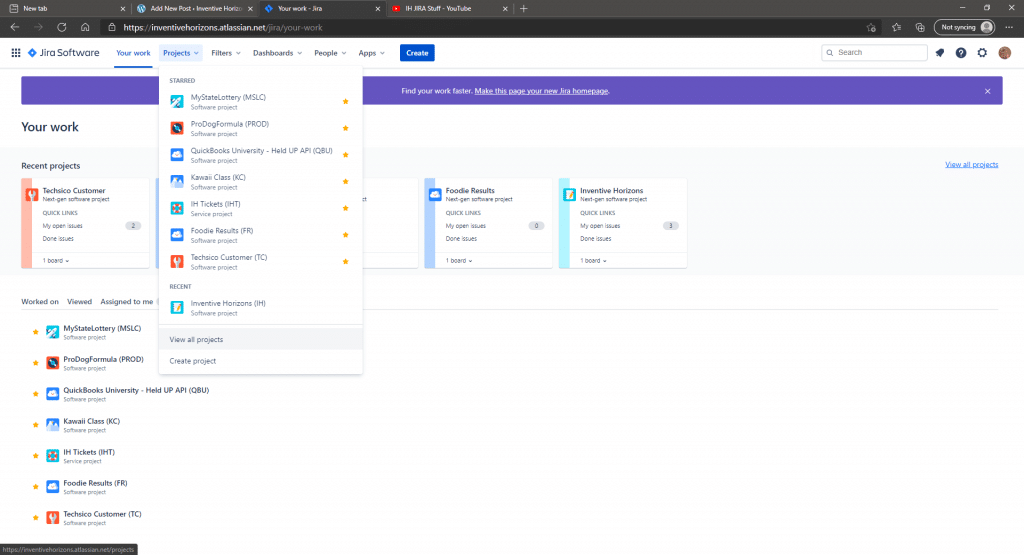
On the projects tab, you can view the projects that you’ve starred, recently opened projects, and also the option to view all the projects made and creating a new project.

Projects tab

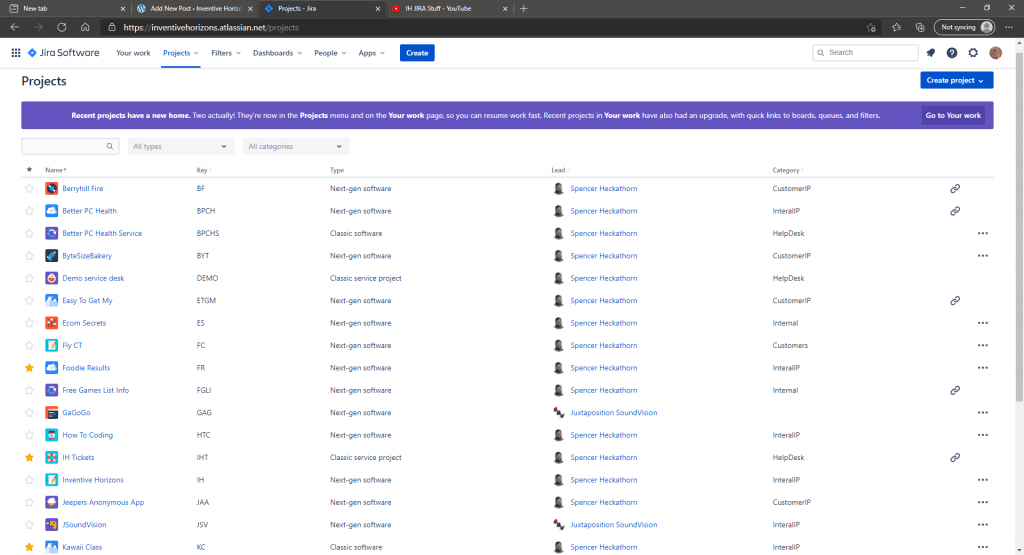
Upon viewing all the projects, it shows all projects made by your team, and it also shows the Key project, the type of project, the lead, and the category of the project. It gives you the option to sort it by project type or categories, and it even gives you a search button if you’re still having a hard time looking for a specific project. You can still create projects using the top right button.

Viewing all projects

Managing a specific project

Upon opening a specific project, you’ll be able to see certain types of menu like the roadmap, backlog, board, reports, code, add an item, and project settings.

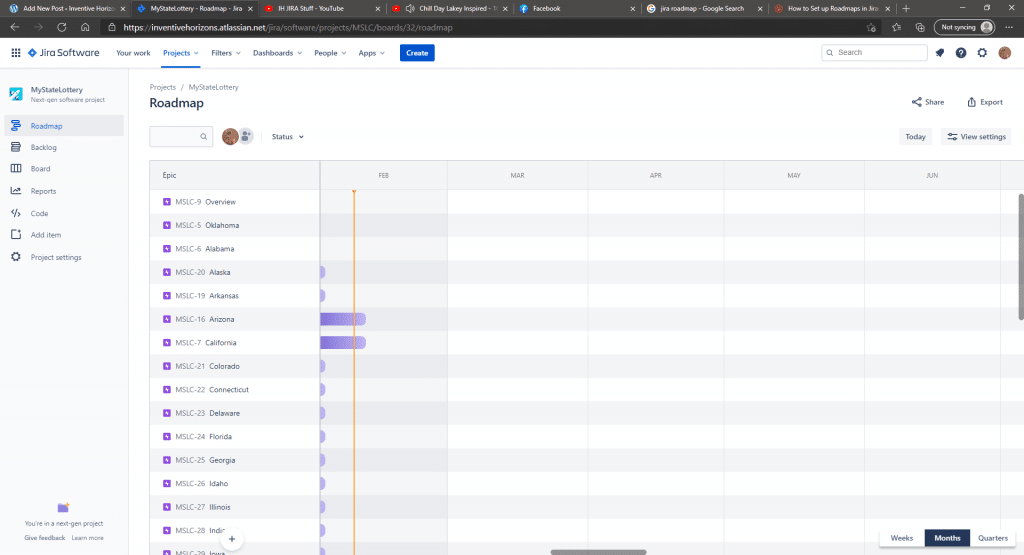
Roadmap

Roadmaps are one of JIRA’s features built to illustrate the team’s strategic vision and to show the teams what they should be working on. Jira roadmaps give you the ability to connect tasks into a broader product strategy and to order tasks and priorities based on consumer feedback. Everyone on the team can access the information, and the leader can also change the roadmap when needed.

Roadmap

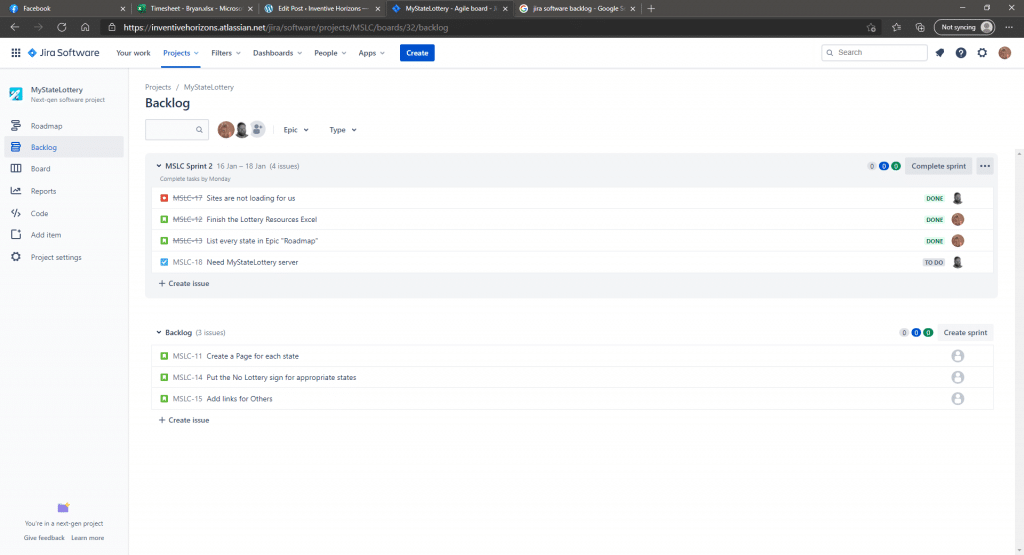
Backlog

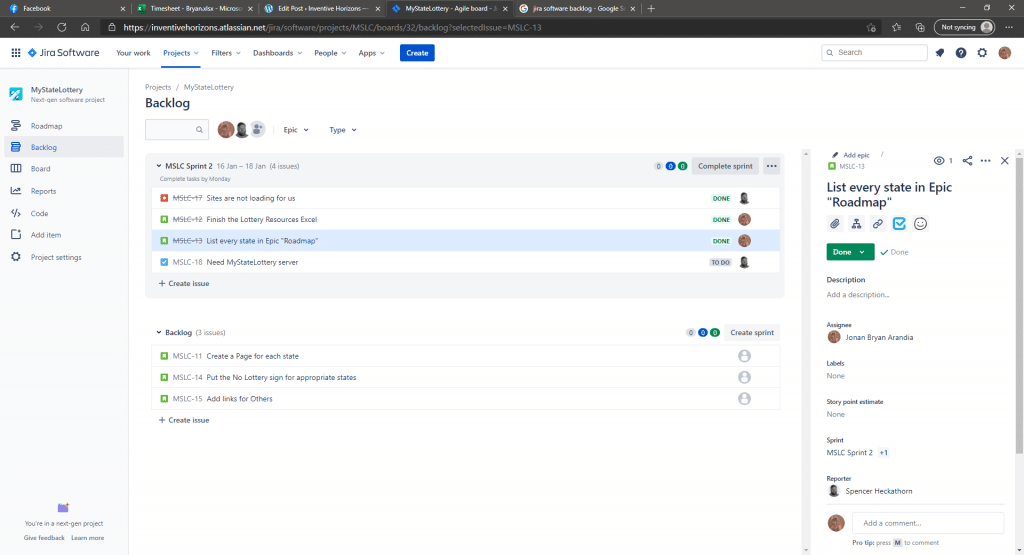
The backlog is the next step after figuring out and setting up your project, and it could also be for anything like a product or a service. It is the section wherein you set-up the things “to-do”(which is called issues). Still, normally it isn’t listed in the form of a detailed summary, more like in the form of a story, like “As a user, I want to do this and that,” but in the end, it’s really all up to you on how would you set it up to makes things understandable for your team.

Backlog Section

A small section would open in the write by Clicking the issue, showing you additional details that you can add or edit, like a description bar, assignee, labels, sprint, etc.

Editing Issues

Board

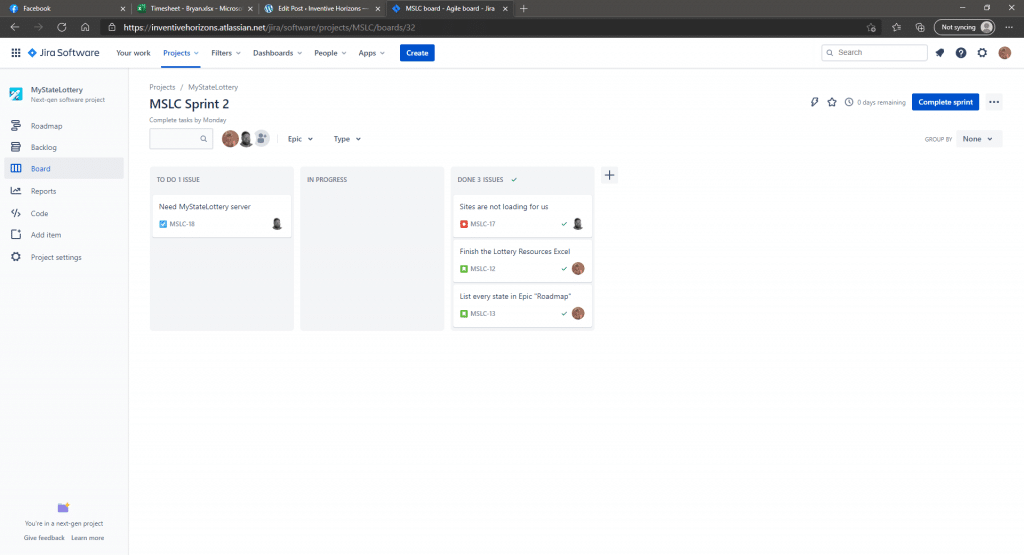
A board is a section where it shows you the issues created of a certain project that you are currently on. It is possible to have multiple boards on a single project if you are working and segments. In this section, you could also sort the issues by epics, types, or even group them to have them organized. Creating an issue would automatically put it on the “TO DO” column by default, but it also gives you the ability to add or edit columns depending on your system.

Backlogs